Skip to main contentNOTE: This option is available only for workspace owners and administrators. To learn more on granting administrator permissions, click here.
How to access it?
Manage is available in the sidebar of your workspace.
- Expand the sidebar.
- Click on Manage to open the Manage page.
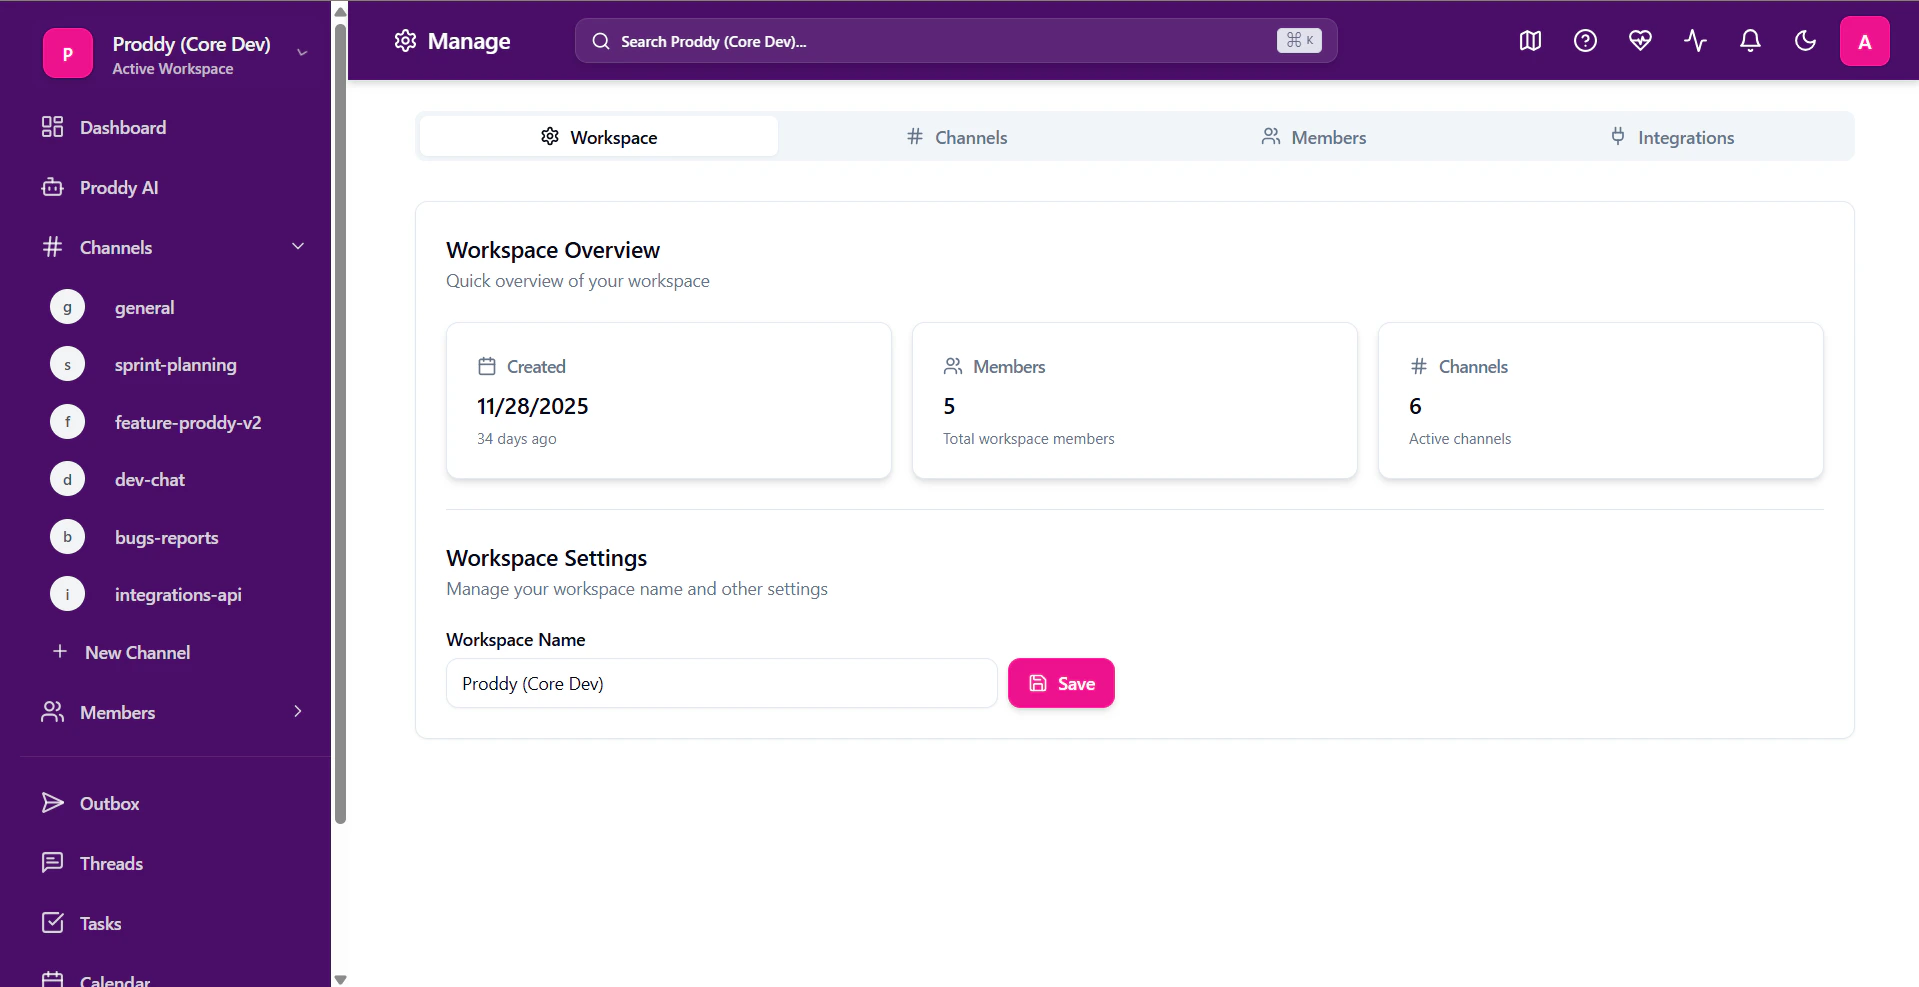
Workspace
Renaming a Workspace
To rename a workspace:
- Open the Manage page.
- Under the Workspace tab, find the Workspace Name option inside Workspace Settings.
- Type in the new name and click Save.
- Your workspace name will be updated.
Channels
This tab manages all the active channels inside the workspace.
To access the Channels tab:
- Open the Manage page.
- Select Channels from the given tab menu.
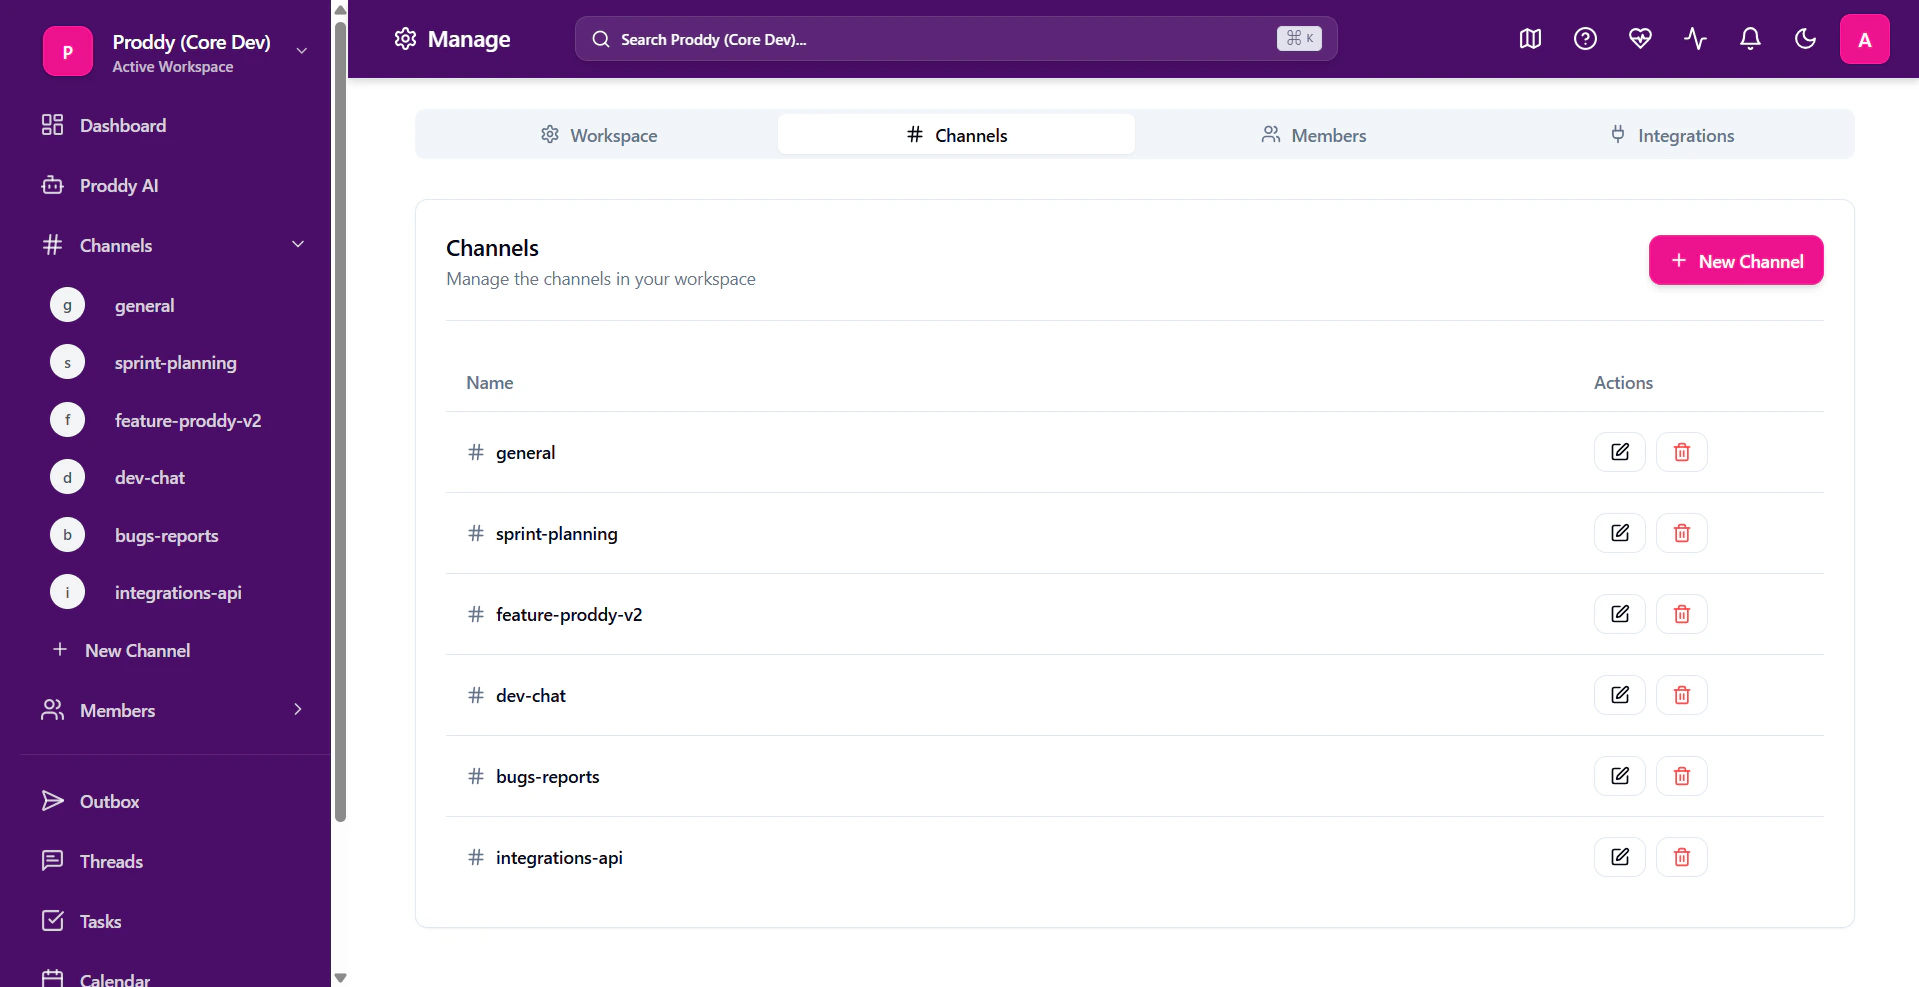
Creating a new Channel
To create a new channel:
- Open the Manage page.
- Go to the Channels tab as directed above.
- Click on the New Channel option.
- Enter a name for the channel, and select an emoji (optional)
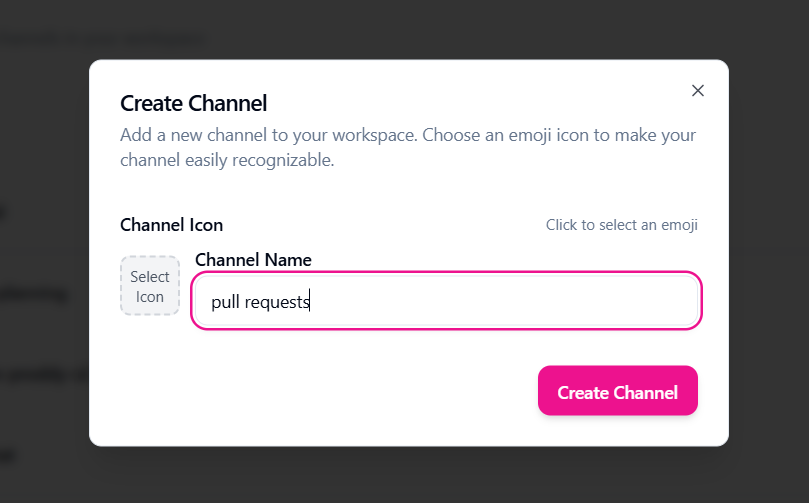 Then click on Create Channel to add it to your channels list.
Edit a Channel
To edit a channel in the workspace:
- Open the Manage page.
- Go to the Channels tab as directed above.
- Click on the edit icon next to the active channels.
- After editing, click on Update Channel to save your edits.
Deleting a Channel
To delete a channel in the workspace:
- Open the Manage page.
- Go to the Channels tab as directed above.
- Click on the delete icon next to the active channels.
- Confirm your choice by clicking on ‘Delete’.
Caution: This action cannot be undone. This will permanently delete the channel and all of its messages.
Members
Manage workspace members and permissions. This section allows administrators to invite new users, assign roles, and control account access levels.
To access it,
- Open the Manage page.
- Select the Members tab from the given tab menu.
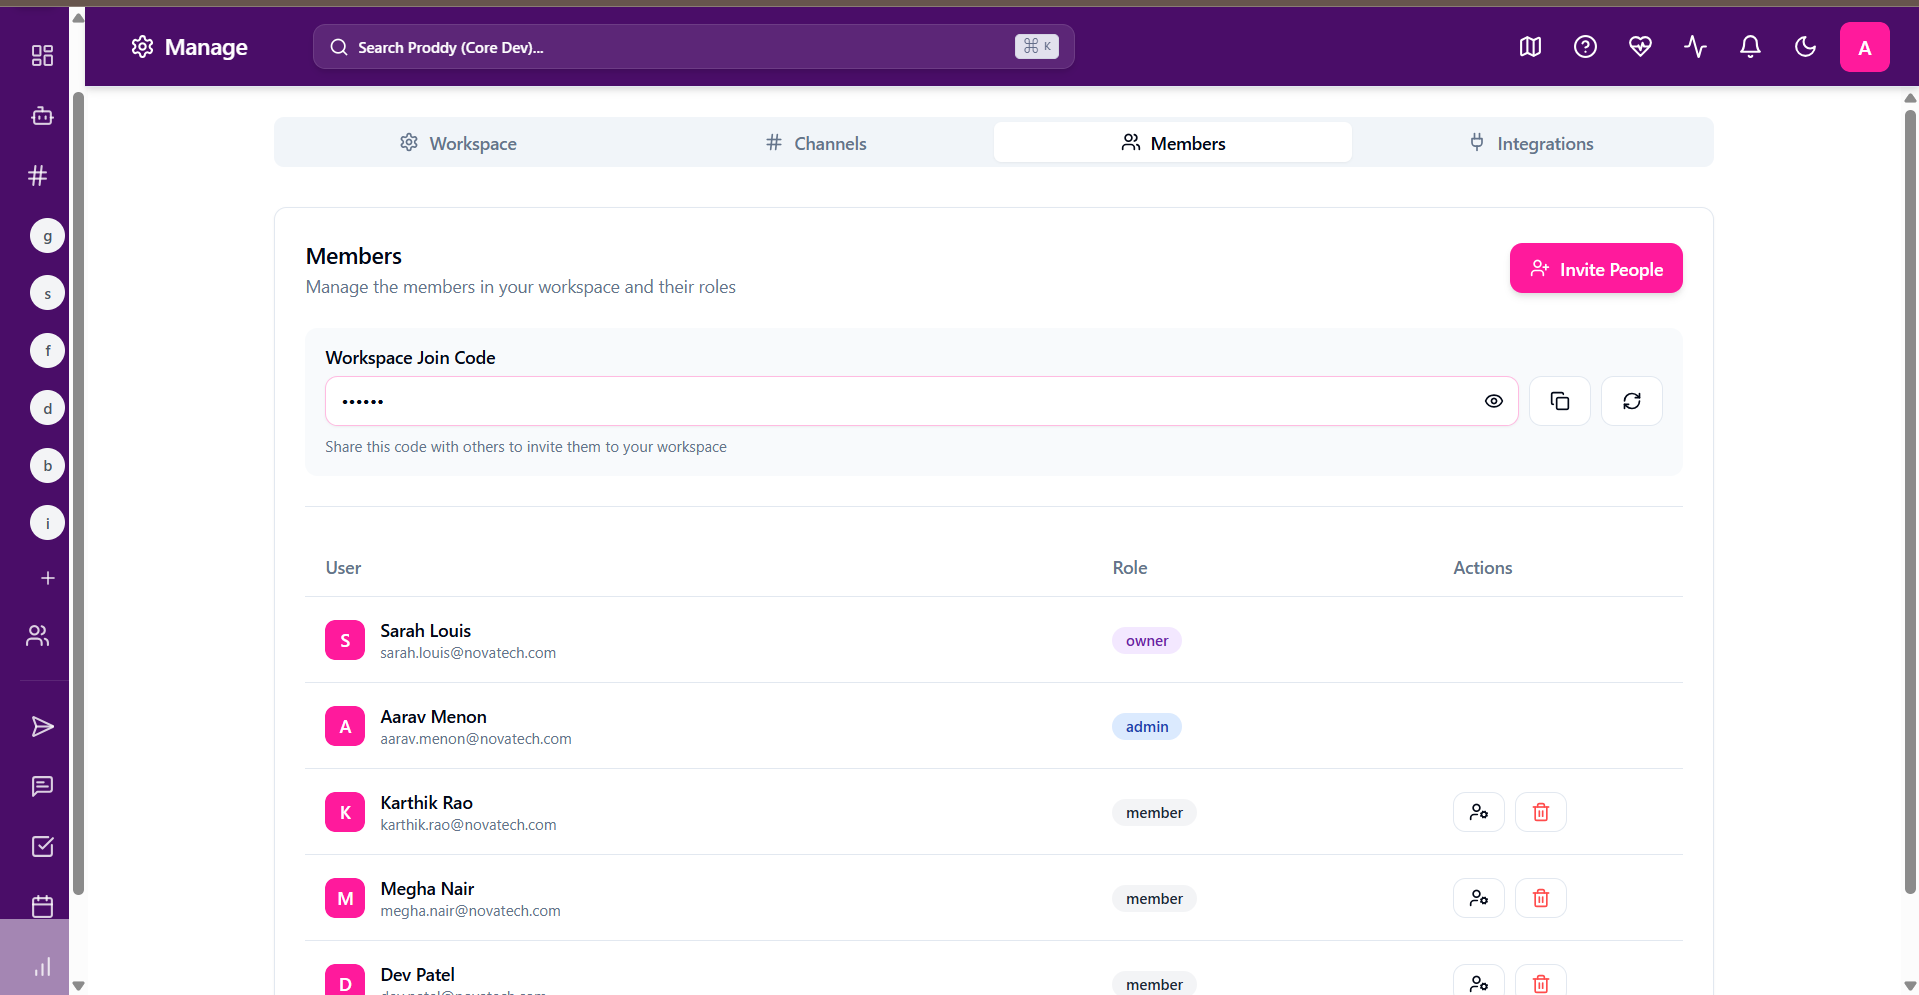
Inviting new Members
You can invite new members to your workspace by sharing your workspace link and code with them. To know more about joining a workspace, click here.
To invite a member:
- Open the Manage page.
- Go to the Members tab as directed above.
- Click on Invite People.
- Copy the link and code and share it with your teammates.
Changing the workspace code
To create a new code for the workspace:
- Open the Manage page.
- Go to the Members tab as directed above.
- Click on the refresh icon to change the workspace code.
- Share it with your teammates to help them join your workspace.
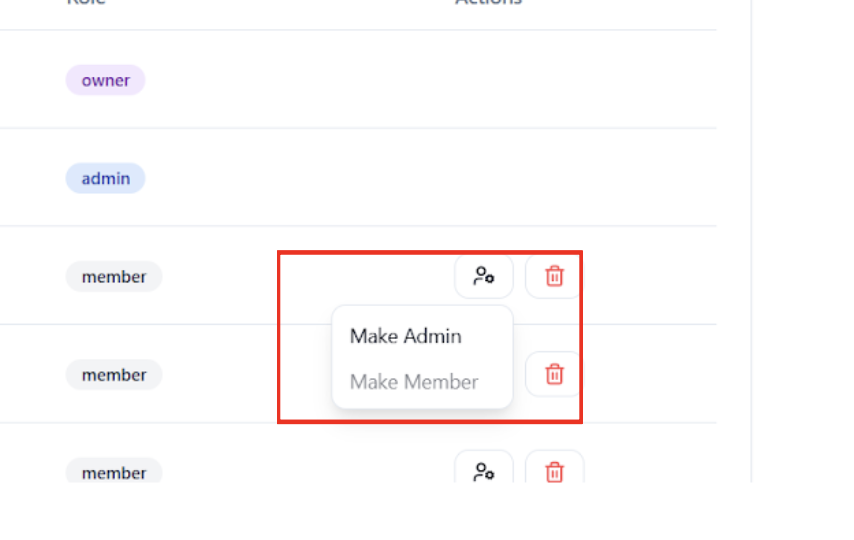
Editing User Permissions
To change user permissions:
- Open the Manage page.
- Go to the Members tab as directed above.
- Click on the user icon next to the user name.
- Select from the following options:
- Make Owner
- Make Admin
- Make Member
Removing a User
To remove a user from the workspace:
- Open Manage page.
- Go to the Members tab as directed above.
- Click on the Delete icon next to the users to remove their access to the workspace.
- Click on Remove Member to confirm your action.
Caution: This action cannot be undone. This will remove the member from your workspace and delete all of their messages and reactions.
Integrations
This tab shows settings related to connecting your workspace with various other third-party apps. This effectively increases productivity of the workspace by integrating all into one place.
To access it:
- Open the Manage page.
- Select Integrations from the given tab menu.
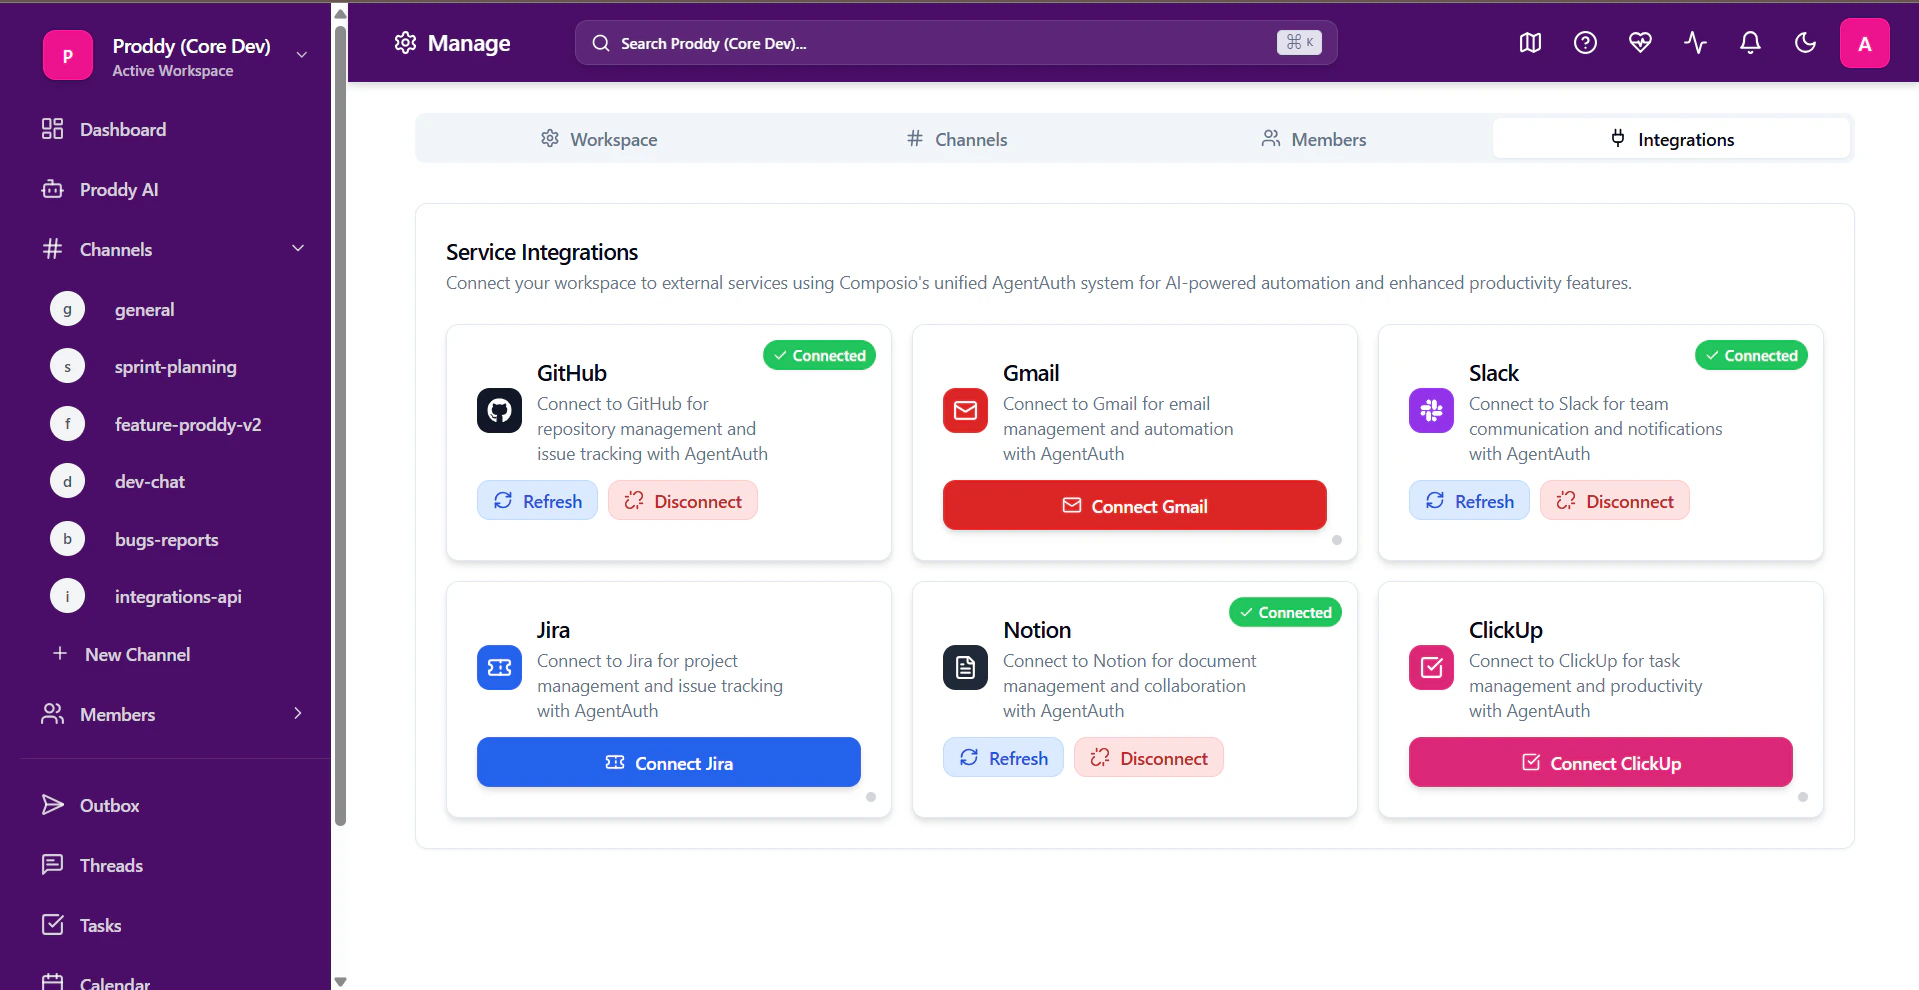 You can integrate any of the following third-party services:
- GitHub
- Gmail
- Slack
- Jira
- Notion
- ClickUp
Note: You can refresh each connection by clicking on the Refresh button. 
